Blogs

Google Email Password Reset

Losing access to your Google account can feel overwhelming, especially when you need important emails or access to connected services. Fortunately, Google provides several straightforward ways to recover your account. Whether you’ve forgotten your password or suspect unauthorized access, this guide will walk you through every step of the Google email password reset process while offering valuable security tips.

Common Reasons for Password Reset

Before we dive into solutions, let’s examine why you might need to reset your password:

  • Memory lapse: You simply can’t recall your current password
  • Security breach: Suspicious activity suggests someone else accessed your account
  • Precautionary measure: You want to update to a stronger password
  • System lockout: Multiple failed attempts triggered Google’s security

Regardless of your situation, the following methods will help you regain access efficiently.

Step-by-Step Reset Methods

1. Standard Account Recovery Process

When you can’t remember your password, follow these steps:

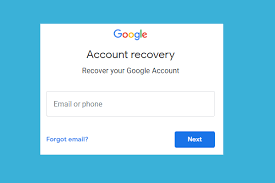
First, navigate to Google’s recovery page at accounts.google.com/signin/recovery. After entering your email address, select the “Forgot password?” option. Next, you’ll need to verify your identity through one of these methods:

  • A verification code sent to your recovery phone
  • An email to your backup address
  • Answers to your security questions

Once verified, you can create and confirm your new password. Finally, use these updated credentials to access your account.

Google Email Password Reset

2. Password Change While Signed In

If you’re currently logged in on another device:

Begin by accessing your Google Account settings. Then, choose the “Security” tab followed by “Password.” After entering your current password, you can establish a new one. Make sure to save these changes before exiting.

3. Advanced Recovery Options

For more complicated situations:

Visit Google’s support page at support.google.com/accounts where you’ll find additional recovery resources. Alternatively, you can complete their detailed recovery form with as much account information as possible.

Troubleshooting Common Issues

Verification Problems

When Google can’t confirm your identity:

Initially, try recalling any previous passwords you’ve used. Additionally, attempt the recovery process from a familiar device or location. If these don’t work, provide supplementary details like your account creation date or recent emails you’ve sent.

Inaccessible Recovery Options

If you’ve lost access to your backup methods:

First, check if you set up security questions. Meanwhile, look for any saved backup codes from two-factor authentication. As a last resort, thoroughly complete Google’s account recovery form with all the information you remember.

Compromised Accounts

For suspected hacking incidents:

Immediately visit Google’s hacked account page to report the issue. Subsequently, follow their security recommendations to reclaim your account. Afterwards, enable two-factor authentication for enhanced protection.

Preventative Security Measures

To minimize future access problems:

✅ Establish multiple recovery options including both email and phone verification
✅ Create strong, unique passwords combining letters, numbers, and symbols
✅ Activate two-factor authentication for an extra security layer
✅ Store backup codes securely in case you lose device access
✅ Regularly update credentials every few months

Frequently Asked Questions

❓ How quickly does a password reset take effect?

Most resets complete immediately after verification. However, accounts requiring additional review might take 3-5 business days.

❓ Can I recover my account without a phone number?

Absolutely. You can use your recovery email or security questions instead of phone verification.

❓ What if I don’t remember my recovery email?

Try providing extensive account details in the recovery form, including old passwords and approximate creation dates.

❓ Why does Google request my previous password?

This verification step helps confirm your identity when other methods aren’t available.

❓ How do I reset when logged out everywhere?

Start with the standard recovery process we outlined earlier in this guide.

Final Recommendations

Now that you understand the Google email password reset process, we strongly recommend setting up multiple recovery options before you need them. Proactive security measures can prevent stressful lockout situations.

💡 Helpful Tip: Bookmark this guide or save it for future reference. For additional security advice, explore our related articles on account protection and password management.

Still experiencing difficulties? Share your specific situation in the comments below, and we’ll provide personalized assistance!

Blogs

Best Emulator for Low End PC: Bluestacks Optimized Guide

Are you searching for the best emulator for low end PC to enjoy Android games and apps without lag? Look no further—Bluestacks 5 is a top choice for gamers with budget-friendly systems.

Unlike older versions, Bluestacks 5 (also called Bluestacks X) is optimized for low-end PCs, offering better speed, lower RAM usage, and smoother gameplay. In this guide, we’ll explore:

  • Why Bluestacks is the best emulator for low-end PCs
  • Key performance optimizations
  • Step-by-step setup for maximum efficiency
  • FAQs and troubleshooting tips

Let’s dive in!


Why Bluestacks 5 is the Best Emulator for Low End PC

Many emulators demand high-end specs, but Bluestacks 5 is designed to run smoothly on weaker hardware. Here’s why it stands out:

✅ Lightweight Performance – Uses 40% less RAM than previous versions.
✅ Faster Loading Times – Engineered for quick app launches.
✅ Game-Optimized Modes – Adjusts settings automatically for smoother gameplay.
✅ Wide Compatibility – Supports thousands of Android apps.

Minimum System Requirements for Bluestacks 5

ComponentMinimum Requirement
OSWindows 7 or higher
RAM4GB (8GB recommended)
CPUIntel/AMD Multi-Core
Storage5GB Free Space
GraphicsIntel HD 3000 or better

Even if your PC barely meets these specs, performance tweaks (covered later) can help!


How to Install & Optimize Bluestacks 5 for Low-End PCs

Step 1: Download Bluestacks 5

  1. Visit the official Bluestacks website.
  2. Click “Download Bluestacks 5”.
  3. Run the installer and follow on-screen instructions.

Step 2: Optimize Bluestacks for Best Performance

After installation, apply these critical tweaks:

1. Enable Performance Mode

  • Open Settings (gear icon).
  • Go to Performance tab.
  • Select “Low (1 CPU Core, 1GB RAM)” for weak PCs.

2. Adjust Graphics Settings

  • Set Graphics Engine Mode to “Compatibility”.
  • Choose “OpenGL” for better stability.
  • Lower FPS to 30 if needed.

3. Disable Unnecessary Features

  • Turn off Background Apps in Settings > Preferences.
  • Disable Notifications to reduce CPU load.

4. Allocate More Resources (Optional)

  • If your PC has extra RAM, assign 2GB+ in Performance Settings.
https://suhuyinistudios.com/

Best Bluestacks 5 Alternatives for Low-End PCs

While Bluestacks 5 is great, here are two lightweight alternatives:

  1. LDPlayer 9 – Optimized for gaming with low RAM usage.
  2. NoxPlayer – Lightweight but slightly heavier than Bluestacks 5.

(For more options, check our guide on best Android emulators for old PCs Here.)


FAQ: Best Emulator for Low End PC

❓ Can Bluestacks 5 run on 2GB RAM?

Yes, but with heavy lag. We recommend 4GB+ for smooth performance.

❓ Does Bluestacks 5 support Windows 7?

Yes! It works on Windows 7, 8, 10, and 11.

❓ How to reduce Bluestacks lag on a weak PC?

  • Lower FPS to 20-30.
  • Close background apps.
  • Use Performance Mode (Low Settings).

❓ Is Bluestacks 5 safer than older versions?

Absolutely! It has fewer ads and better security.

(For more troubleshooting, see our Bluestacks error fixes guide (internal link).)


Final Verdict: Is Bluestacks 5 the Best Emulator for Low-End PCs?

Yes! Bluestacks 5 is the best emulator for low-end PCs because:

✔ Runs smoothly on 4GB RAM
✔ Easy to optimize with performance modes
✔ Supports most Android apps

If your PC struggles, apply our optimization tips for the best experience.


Call to Action (CTA)

🔥 Ready to game smoothly on your low-end PC?
👉 Download Bluestacks 5 Now and follow our guide for lag-free performance!

Have questions? Drop them in the comments below!

Blogs

AirDroid Parental Control App

In today’s fast-moving digital world, parenting isn’t just about playground rules or bedtime stories. It’s also about keeping your kids safe online. That’s where the AirDroid parental control app comes in.

This powerful tool gives parents full visibility into their children’s smartphone usage—without being intrusive. Whether you’re worried about screen time, online predators, or simply want to build better digital habits, AirDroid’s parental control app gives you the tools you need—all in one place.

Let’s explore what makes AirDroid the smart, modern solution for digital parenting.

Parent using AirDroid parental control app to monitor child's digital activity safely.

What Is the AirDroid Parental Control App?

The AirDroid parental control app is a mobile application designed to help parents manage, monitor, and protect their kids’ online activities. Built by Sand Studio, the same team behind the popular AirDroid remote access app, this tool offers a wide range of parental controls—all with real-time syncing and remote features.

With AirDroid, you can:

  • Monitor your child’s screen in real-time.
  • Track app usage and screen time.
  • See their GPS location and movement history.
  • Set daily time limits and app usage rules.
  • Get instant alerts when your child is exposed to inappropriate content.

And the best part? It works smoothly on both Android and iOS devices.


Key Features of AirDroid Parental Control App

Let’s break down the most useful features that make AirDroid a standout choice:

1. 📱 Remote Monitoring

Watch your child’s screen in real-time from your device. You can see what apps they’re using, what they’re typing, and even take screenshots.

2. 📍 Location Tracking

Always know where your child is with GPS-based location tracking. You can:

  • View their current location
  • Check their travel history
  • Set geofencing alerts to notify you when they leave or enter a zone

3. ⏳ Screen Time Management

Too much screen time? No problem.

  • Set daily screen limits
  • Block usage during homework or bedtime
  • Lock devices remotely

4. 📂 App & Usage Reports

Track which apps your child uses the most.

  • See how long they spend on each app
  • Get weekly or daily usage reports
  • Identify any potential digital addiction early

5. 📞 Call & Message Monitoring

You can monitor SMS and calls, including:

  • Call logs
  • Text message history
  • Alert words for suspicious content

Tip: Always talk to your child about why you’re using parental controls. It’s about protection, not punishment.


How to Use the AirDroid Parental Control App (Step-by-Step)

Getting started is surprisingly simple. Just follow these steps:

  1. Download the AirDroid Parental Control App on your device (Android or iOS).
  2. Create an account or sign in using your AirDroid credentials.
  3. Install AirDroid Kids on your child’s device and connect both devices via a pairing code.
  4. Grant necessary permissions (screen access, location, etc.) for full monitoring.
  5. Start monitoring and customizing the settings based on your family’s needs.

Parent using AirDroid parental control app to monitor child's digital activity safely.

Why AirDroid Is Better Than Other Parental Control Apps

There are many parental control apps out there. But AirDroid stands out for a few big reasons:

  • Real-time screen monitoring (most apps only offer logs)
  • Remote control capabilities
  • Easy-to-use interface
  • Cross-platform support
  • Affordable premium plans

📊 Quick Comparison Table

FeatureAirDroidQustodioNorton FamilyGoogle Family Link
Real-Time Screen Mirroring✅ Yes❌ No❌ No❌ No
Cross-Platform Support✅ Yes✅ Yes✅ Yes❌ Android Only
Geofencing Alerts✅ Yes✅ Yes✅ Yes✅ Yes
Remote App Blocking✅ Yes✅ Yes✅ Yes❌ Limited

Pros and Cons of the AirDroid Parental Control App

Pros:

  • Easy setup and user-friendly dashboard
  • Real-time monitoring
  • Smart alerts and geofencing
  • Affordable pricing

Cons:

  • Advanced features require a premium plan
  • Some features work better on Android than iOS
  • Kids may notice the app if not educated about it

Real Parent Testimonials

“AirDroid saved my sanity! I finally have peace of mind knowing where my daughter is and what she’s doing online.”
— Jessica R., Parent of a 13-year-old

“I tried three other apps before this, but none offered real-time monitoring like AirDroid.”
— Ahmed K., Father of two teens


FAQ: AirDroid Parental Control App (with Schema Style)

What is the AirDroid Parental Control App used for?

The AirDroid Parental Control App helps parents monitor their children’s phone activities, location, and screen time to ensure a safer digital experience.

Is AirDroid Parental Control free?

AirDroid offers a free trial, but full features like screen mirroring and remote controls require a premium plan.

Can AirDroid Parental Control App track real-time location?

Yes, it can track your child’s real-time GPS location and even send alerts when they leave a set area.

Is the AirDroid Parental Control App available for iOS?

Yes, it supports both Android and iOS devices, although some features are more robust on Android.

Can kids uninstall AirDroid from their phones?

Not easily. The app is protected with admin permissions and alerts the parent if removal is attempted.